dryer vent cleaning time
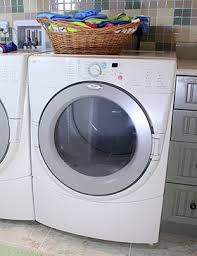
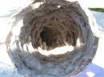
Cleaning the dryer vent – Why is dryer vent cleaning important? Clogged dryer vents can be costly to a home so cleaning the dryer vent is extremely important for a number of reasons. According to the U.S. Federal Emergency Management Agency (FEMA), a full load of wet clothes can contain up to one and a half gallons of water. With the drying process: Moisture is removed along with tiny fibers (lint) Lint and other debris accumulate in dryer vent ductwork Dark, moist ductwork becomes an ideal breeding ground for mold Cleaning the dryer vent will cleanse the dryer vent system, removing all debris that have built up over time. Cleaning the dryer vent is an often overlooked, but important step in maintaining your home or building. A good rule of thumb is to have dryer vent and air duct cleaning performed at the same time. Cleaning the dryer vent is also significant in reducing the risk of fire to your home. According to a recent FEMA study, 28% of residential clothes dryer fires were caused by dust, fiber and lint.
Temperature of the dryer to increase dramatically Reduction in the lifespan of your appliance
easy way to clean wooden venetian blinds Signs you need dryer vent cleaning: Consider cleaning the dryer vent if… it takes more than one drying cycle to dry one load of laundry Consider cleaning the dryer vent if … the dryer is hot to the touch indicating it is overheating Consider cleaning the dryer vent if … clothes smell “musty” after being in the dryer Consider cleaning the dryer vent if … you see an increase in energy bills (dryer has to run longer and work harder to dry clothes) Cleaning the dryer vent enables the dryer to perform properly Cleaning the dryer vent allows clothes to dry more quickly and evenly Cleaning the dryer vent can save $18-$24 on monthly power bills Cleaning the dryer vent creates peace of mind by eliminating a potential fire hazard

Cleaning the dryer vent limits mold, mildew and other bacteria on your clothes and in your home Call 877-800-2382 for Dryer Vent Cleaning.MASONRY HEATERS AND OVENS | INVESTIGATIONS Call 816.461.3665 to make an appointment. Your local, professional dryer everything expert. I know all things related to your clothes dryer. to discuss your dryer needs. Call for same day & next day appointments. Price: $49.00* plus parts Let me take a look at your dryer along with the venting to make sure it is working properly and that your home is safe. A multipoint inspection doesn’t take very long but I often am able to resolve issues that may save you money in the long run. *Price is for the safety inspection only, but will be applied to additional recommended services. Estimate given at time of service. Starting at $49.99* plus parts Have an existing dryer vent not working properly or maybe it wasn’t installed per code requirements? Or do you need a new dryer vent installed where one wasn’t before.
I can complete the process from design, to installation to inspection. *Price is for the vent inspection only, but will be applied to additional recommended services. Price: $99.00* plus parts A clean dryer vent will reduce drying times which will reduce wear and tear on your clothes, your dryer and save you money in the process. Oh, and don’t forget, the most likely cause of a home fire is right there in your laundry room. Let me take care of the work and make sure you are safe in your home. *Price is labor only, parts, supplies, vents requiring roof or ladder access are additional. Dryer Service & Repair Price: $129.00* plus partsAs a master appliance technician, I have the skills, the knowledge and the tools needed to ensure your dryer is repaired properly so you can get back to your life. I specialize in dryers just like yours so I know how to quickly identify and repair the issue. This saves you time and money. *Repair services are for labor only, any parts or supplies needed will be additional.

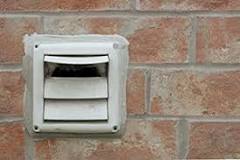
Should you decide not to have the dryer repaired, I do ask for $49 to cover my travel and diagnostic expenses. In-wall dryer connection protects transition hose neatly in the wall. DryerJacks are engineered specifically for the demanding requirements of roof venting a dryer. This smooth interior allows the dryer to perform at peak efficiency. It’s strong aluminum ribbon protects against crushing and flame spread. Designed to deliver zero airflow restriction, Dryer Wall Vents™ are safe for dryer venting. DrySafer™ Dryer Lint Alarm Detect dangerous lint build up before it causes damage, potential injury or death. Protect your home and family. Every day more than 40 dryers catch fire in the US alone. Long turn elbows for better airflow efficiency and longer duct runs. The Defender’s patented design, features vertical bars that hinder lint buildup while making it difficult (if not impossible) for most pests to gain entry. Whirlpool Dryer Rubbing Noise

Model #LEW0050PQ3, this small 24 inch electric dryer had started to make a rubbing sound while in use. The noise seemed to come and go while in use, but was definitely getting worse with time. Due to it’s location inside a closet, and stacked on top of the washer, it was difficult to determine the source of the noise, so professional help was brought in, which happened to be me. It is not uncommon for a dryer to make noise, simply due to the mechanical nature of their design, and the environment they work within. Tumbling a heavy load of damp clothes through varying temperatures all while drawing in large quantities of dust filled air can really put a strain on anything mechanical. But the nice thing is, most are relatively easy to work on, and if you pay attention to the noise it is making, the source can usually be found rather quickly. To do this, I usually suggest listening to the frequency of the noise to help locate the source. A noise that repeats very quickly will be associated with something small like an idler roller, support rollers, and support bearings.

Noises the repeat more slowly, such as with each drum rotation, will have some association with the drum itself. With this information and getting your ears into the search, locating which one of the dryer parts has failed, is as simple as paying attention. Now it’s not always that easy, especially if your dryer is stacked and located in a closet, but the process works the same, it just requires more preparation. With this dryer, I started a test cycle and after the running for about 5 minuets, a distinct slow rubbing sound could be heard from the back of the dryer. It’s sometimes easier to tell location if you put your ear on the dryer much like a stethoscope. The noise repeated with every drum rotation, giving me enough information to figure this dryer needed a new rear seal. Most dryer drums will use a felt or felt/rubber type seal to help with airflow, and to prevent clothing items from becoming stuck between the drum and the edge of the dryer. This dryer uses a seal that is rubber to create the seal with the rear panel, and uses a felt portion that rides against the back of the drum.

It works very well, until something changes, or it simply fails from age and temperature. With the dryer down on the floor where I could work on it, I removed the rear panel to get to the mechanical parts of this dryer. The drum is attached in the back, and rides on a nylon glide which must be removed first or the panel will not come off. Once I had the panel pulled away, I could see in the lower corner how the felt was compressed exposing the rubber behind it. By rotating the drum, I found the exact spot that was contacting the seal and it looked as if the metal in drum had been pushed out just enough to apply more pressure to the seal. Something as simple as drying shoes without other clothes could cause this kind of damage. The repair was to simply pop the drum back into its original shape, and to replace the rear seal. A little cleaning here and there to remove excess lint, and then put it all back together. Once the dryer was back on top of the washer, a test load was started, but now the only sounds from the dryer were those we are familiar with.