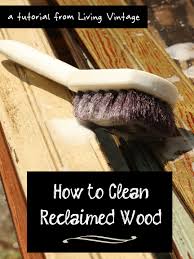
best way to clean unfinished wood furniture

Mild cleaners keep unfinished wood looking its best. Wood furniture that is untreated -- that is, unfinished or unsealed -- behaves much like a fresh unused board, porous and absorbent. Harsh chemical cleaners are out of the question, as they may damage or discolor the wood as it absorbs the liquid. Natural cleaning methods offer a safe alternative friendly to furniture and humans alike. Bust the Dust Dusting furniture regularly keeps it looking its best without harming the wood. Without dusting, debris may become caked on over time, making it more difficult to remove. Use a feather duster or soft cloth to remove dust regularly. A vacuum cleaner with an upholstery brush attachment can also be used. Rub a soft-bristled brush such as a toothbrush, artist's brush or makeup brush into crevices to remove trapped dirt and dust. Soapy Solution Sometimes goop happens, such as when a bit of ice cream sundae drips onto the arm of a wood chair, hardening in place. A squirt or two of natural dish soap mixed into a bucket of lukewarm water serves as a mild cleaner for untreated, unfinished wood.

Homemade Helper White vinegar comes to the rescue to remove fingerprints, grime and general dirt left on unfinished furniture. Mix a tablespoon of vinegar into a spray bottle containing a few ounces of water, then squirt the solution onto the affected area, wiping away with a damp cloth.
what is the best way to clean faux blindsWipe the cleaned area with a dry cloth afterward to keep the moisture from soaking into the wood.
best suction on vacuum cleanerA stronger vinegar solution, such as 50/50 vinegar and water, may be used for heavier cleaning. Sticky Situations Chewing gum or pine tree sap create a sticky mess that may seem difficult to remove from wood without causing damage to the furniture. Place a few ice cubes in a zippered sandwich bag, then set the bag over the problem area until the gum or sap hardens.
Carefully chip the hardened mass away with a plastic knife or spatula. References Michigan State University Extension: Homemade CleaersDynasty Restoration: Simple Cleaning Steps to Protect Your Teak Deck and Any Unfinished Marine Wood FurnitureUrban Wood Goods: Wood CareBona: Holiday Tips for Hardwood Floors Photo Credits Thomas Northcut/Photodisc/Getty Images Suggest a CorrectionCleaning ProductsCleaning IdeasHousehold CleaningCleaning SolutionsCleaning HintsEasy CleaningCleaning TricksCleaning AngelCleaning MamaForwardTired of dirty windows? Try this simple way to clean your windows like a pro. 316 posts, read 1,017,853 times 2,598 posts, read 3,573,354 times Natural Ways to Clean Untreated Wood Furniture Natural Ways to Clean Untreated Wood Furniture | 4,575 posts, read 4,472,837 times 14,535 posts, read 42,446,495 times 9,635 posts, read 4,568,057 times 26,534 posts, read 57,221,272 times First off, I really doubt anyone would want to use "baking powder" for anything other cooking as it considerably more costly than "baking soda".

Secondly I am skeptical about over use of baking soda, it is a caustic / alkali substance whose manufacturing is fraught with waste issues -- How baking soda is made - material, manufacture, making, history, used, processing, structure, product, Raw Materials, Quality Control, The Future 220 posts, read 309,550 times Originally Posted by hkrn44 Did the damp paper towel not clean it as well as you wanted? Usually that works for me if I'm only dealing with spider webs, dust, and small loose particles. Are you concerned about disinfecting? Are you're dealing with ground in dirt or sticky stuff? For odor, slight or heavy, the very best thing I've ever found is Odoban, a spray that Home Depot seems to always have in stock. Lowe's and Walmart may have it also. Have only used the eucalyptus scent (which I like), not the lavender. I used it for a moderate odor on the inside of a used wooden chest of drawers and it did a great job. The odor has not returned and it's been several years.

Since you have only a slight odor, trying starting with a light spray and let it dry completely. Repeat until the odor is gone. The light sprays should not hurt the wood if you let each dry completely. Don't know whether this will hurt the wood finish, so just hit the unfinished wood. I wanted to spray inside the chest itself as well as inside the drawers, so I removed the drawers and used a fan to dry everything quickly. If you want to first try a light spray just inside the drawers, I don't think drawer removal and a fan are necessary. A friendly reminder - if you remove the drawers, don't forget to number them in case you need to put them back in order. I've had some chests where this matters.I haven’t written about our Restoration Hardware table since shortly after we received it because I allowed it to paralyze me. The stress, disappointment, frustration & overwhelm was just too much. Instead, our family of 5 sat at an antique table, intended to be my kitchen desk. Chris & I’s legs didn’t even fit underneath it.

We just “closed off” the sunroom & pretended that it, along with the table didn’t exist. We poured over the options time & time again, & realized that the perfect Restoration Hardware table just doesn’t exist. The table we purchased has a beautiful powder finish. That soft, dusty look is unachievable in a maintainable form. No matter what product you use, the finish is going to be altered. Even Restoration’s website notes that “For dining tables, use of tablecloths, placemats and coasters is recommended to prevent staining”, “Clear furniture wax can be applied to protect the finish from minor spills. Use coasters or placemats to help prevent marks or stains” & to “Wipe the table clean with a soft, dry cloth after each use.” I did notice it now says this as well “Care: Wipe using a damp cloth with mild soap and water, followed by a dry cloth. Wipe spills up immediately with a dry cloth.” However, that conflicts with their detailed care instructions & I, along with many of you found that a damp cloth takes the finish right off.

I wish I was writing this with a solution for you today, but I think that it’s a decision each individual has to weigh. Instead, I’m sharing what we chose to do & how we’re moving forward. If you recall, we immediately panicked. My first piece of advice is DON’T PANIC! Nothing good will come of it! If you plan to do anything with it, determine if you need to wipe the finish off first {if you’ve damaged it} or just go over the powder finish. The powder finish easily wipes off with a damp cloth. Below are pictures depicting the wood without the finish Restoration Hardware applies. We chose TRUE Tung Oil, ordered online. There’s a difference – Tung Oil Finish is not 100% Tung Oil. I’m listing the pros & cons based on my understanding & experience: It’s not supposed to alter the color of the wood. However, the first coat must be used with a combination of paint thinner, which does. It released red tones in the wood we finished. A week later & I found it less noticeable.

It has a matte finish. It can have a slightly more matte appearance with A LOT of steel wool & willpower. It protects the wood from stains. It fills the pores, which seals the wood & allows it to easily wipe clean. After using it for a few weeks, I’ve found it durable – oils, crayon, etc have wiped without staining. You can see the sheen from the tung oil in the picture below: * The Tung Oil Finish I used on our harvest table provides a decent amount of protection, but not as wipeable as what we needed for everyday use. You can read more about the first Tung Oil Finish we used on this table here. Another great option would be a matte varnish. They’re difficult to find in stores, but easily accessible online. We used a matte varnish on our stairs & living room at our previous home. This will seal & protect the wood, without altering the color. A few other notes: If you have to stain your wood for various reasons, Minwax Driftwood came the closest to the color that I could find.
After searching Lowe’s & several local hardware stores, I found it at Home Depot. It seeps into the pores of the wood, so the quicker you wipe it off to remove it, the less color that will be applied, however, it gets pretty dark in the grooves. Here are some examples on various boards. I applied it & Chris followed behind wiping it off. These images are before the tung oil was applied. In the end, it’s not perfect, but it’s functional & looks nice. I would not recommend purchasing this table, but if you have experienced a similar situation, know that you will make peace with it, eventually! I have learned so much from this table. One of the most important lessons is that sometimes we need to redefine our expectations. Through all of your comments & emails, I learned that I am not alone. More importantly, I remembered that it’s just a table. Despite wasted time, money & energy, it’s still just a table. It’s a table where I can share breakfast, lunch & dinner with my family.

It’s a table I can {& have} shared laughs, wine & tears. It’s a table where I can invite friends & family to get together & share the story of those laughs, wine & tears. It’s a table that brought us together to help each other. If you have an experience with your table & can offer additional help to others, please leave a comment below. If this post & comment thread can save someone even a few of the hours & frustration we put into our table, it’s worth it. Thanks for being patient with me. I truly appreciate all of your comments! 7/21/15 Update: new table, kept Restoration Hardware powder finish on with white flour sack towels, applied Tung oil and used 0000 super fine steel wool to dull the finish. Below are a couple of snapshots of the result. Please use comments below rather than emailing me directly so that they might also help others. Also, many questions have been answered in comments along with reader’s notes, suggestions, and experiences. 11/11/16 Paula graciously sent a photo of her table sealed with Dead Flat Varnish