best way to clean duct tape residue
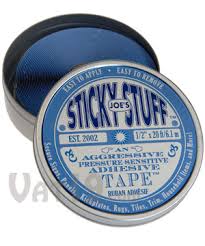
Fun & Strange Stuff Crazy Candy, Food & Drink Gadgets, Tools & Utility Clothing, Costumes & Accessories From $10 to $20 From $20 to $40 Buy a Gift Card Super strong double-sided tape that is easy to remove. + Add to Wishlist You may also like: Tear Mender Instant Fabric Adhesive Joe's Sticky Stuff is the best double-stick tape ever made, hands down. Invented and perfected behind-the-scenes in Hollywood, it was originally used to secure props in place without leaving behind any sticky residue and without damaging the item or the surface to which it was affixed.Strong enough to lift a phone book, but easily removed with just two fingers, you'll find hundreds of uses for Joe's Sticky Stuff around the house and office.Twenty-foot roll (1/2" width) is packaged in a decorative tin. Dimensions: 20 ft roll of 1/2" tape Easy to apply and easy to remove Packaged in a secure-fit tin Waterproof when applied to a dry surface

Watch our Joe's Sticky Stuff™ video Double-sided tape that is strong enough to lift a phone bookJoe's Sticky Stuff™ is an aggressive pressure-sensitive adhesive. A two-inch strip applied to a wood block was easily able to lift a hefty phone book.And while its strength is a huge bonus, what makes Joe's Sticky Stuff™ curiously awesome is the fact that it can be removed from most any surface without causing any damage. You simply pull it to remove -- no chemicals or solvents required.™Joe's Sticky Stuff™ is simple to useLike any double-sided tape, simply tear off the amount you need, stick it to the wall or object, and remove the backing paper. Then, press the object onto the wall or surface. Bam.Simply twist the object to removeIf you ever wish to remove an item, simply twist and pull. Joe's double-sided sticky tape will release its grip on your object without leaving behind any residue.You can also remove the tape without causing any damage to the surface. Simply "scrape" up a corner of the tape with your fingernail and pull.

Hundreds of usesThe easy-to-apply and easy-to-remove Joe's Sticky Stuff™ has hundreds of uses. Here are a few suggestions:At the office:Secure signsHang items for presentations (even in hotel conference rooms or clients' offices without fear of damaging their walls or windows)Hang awesome Jonas Brothers posters in your co-worker's cubicleAt home:Display your children's artwork without thumbtack holes or tape which may rip the paper when removedKeep picture frames or paintings level without marring your wallsDecorate rooms and remove decorations without having to repaint wallsHang holiday decor anywhere in the house, including windowsIn a pinch:Hold down a table cloth during a windy outdoor birthday partyKeep your glass top table from slipping off those tiny plastic discsSeriously, it's pretty strong stuffJoe's Sticky Stuff™ is strong enough to hold your guilt, shame, and addictions. Check out the picture below. A single strip of Joe's Sticky Stuff™ is used to suspend a candy bar, a VHS tape (where did that come from?), and a coffee pot to one of the doors in our warehouse.

Packaged in an attractive metal tinJoe's Sticky Stuff™ is sold in a 20 foot roll (1/2" wide) that's packaged inside an attractive metal tin. Can't live without it?Smash that 'Add to Cart' button! Burning Questions: You Ask, We Answer Want to ask your own Burning Question? First, please watch the video to the right. It explains the Burning Question feature and answers some common questions. Now, if there is something that you need to know about this product that we've omitted, please send us an anonymous question and we promise to answer it within 1 business day.
air duct cleaning ball Please excuse the shameless cross promotions!
leather care products seattle Bottle opener and multi-tool that fits over your house key.
best way to unclog dryer vent
Keeps nails, screws, and drill bits secured to your wrist. Remove unsightly deodorant stains from your shirts.Spell it with a 'K' ER or Krazy Glue? Jar or any glass product 100% cotton towel or old T-shirtFor the price of paint and materials, you can make your humble abode sparkle like the true Pinterest-worthy showpiece it is. While the cost is minimal, the seemingly simple process of laying down paint is deceptively difficult. Consider the following advice to make the job faster, cleaner, and more efficient.
best way to clean teak wood table Avoid cleaning brushes by wrapping your brush tightly in plastic and placing in the freezer.
best hardwood floor cleaner consumer reportsBefore using it again, let the brush thaw for a couple of hours.
best selling vacuum cleaner uk
If you need a break but expect to get back to the job within the same day, wrap your roller cover in plastic and then place it in a Pringles can – there’s no need to remove it from the roller assembly. If you’re stopping more than one day, do the same thing and then place the can in the freezer. Place your paint tray in a plastic kitchen trash bag and push down to expel the air. Use the trash bag’s built-in drawstring to seal it shut.As long as your floor has a glossy surface, let the drips dry. Once they’ve dried, you can easily pick them off with a fingernail. Glue a paint edger pad onto one of those complimentary stirring sticks paint stores give away. 6. Why Pro Painters use Canvas Dropcloths The pros don’t just use canvas dropcloths because they’re reusable. Plastic dropcloths are slippery to walk on; canvas ones are not. Invest in a canvas dropcloth early in your home remodeling process, and you’ll never regret it. A $4 device called a paintbrush comb effectively pulls latex paint out of the brush when you hold it under running water.

Water alone will not clean the brush well and will result in a brush lifespan of only three or four uses. Pro painters know that multiple-gallon projects require paint boxing, which is the process of combining all the paint you will be using into one large container. When painting around windows, carefully run water over a sheet of newspaper and stick the newspaper to the glass. Now you can paint around the window while keeping the glass free of paint. It sounds counter-intuitive, but if you need to fill small holes in your wall with Spackle, start by gently tapping a hammer one time on the hole. The classic method of wiping excess paint from your brush onto the can rim will only add gunk to the can. Painting interior spaces is as much about avoiding areas as it is about laying down paint. Doors, door casings, crown molding, baseboards, window trim, light fixtures, and countertops are just a few examples of areas that you may not want to paint. Learning how to precisely avoid these areas will make your paint job look crisper and cleaner.
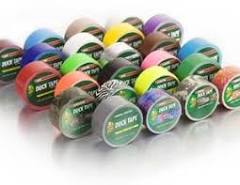
In order of effectiveness, here are the top five ways to mask off or avoid these areas: Forget the beige masking tape your dad used when he painted the house. The industry standard now is painter’s tape, a super-low-adhesive tape that never leaves residue behind and will never pull off paint. Popular painter’s tape brands include Frog Tape, ScotchBlue, and Duck Brand Clean Release. How to Use It: Press tape firmly onto the surface with your fingernail. Failure to do this may result in paint bleeding under the tape. Wait until the paint is dry before pulling off the tape at a 90-degree angle. As long as you use only one or two layers of paint, the tape will cut the paint upon removal. “Cutting in” is a painting term that means painting freehand along an edge, no masking tape required. Like a trapeze artist who performs without a net, this one takes a lot of practice. How to Do It: For your first attempt at cutting in, use an out-of-the-way location where errors will not be so noticeable.
Use a tapered trim brush that you have pre-moistened with water. Shake the brush several times to force the water out. Thoroughly load up your brush with paint so about 3/4 of the bristles are covered in paint. Draw a thick line of paint, called a “reservoir,” about one inch from the edge. Rolls of masking film combine painter’s tape, sheet plastic, and static electricity, giving the ultimate cover-up for large windows, especially when using a paint sprayer. Painter’s tape allows you to mask precisely up to the edge of a window, while the pre-attached plastic film unfolds to cover the window. Static electricity helps the film stick to the window. How to Use It: Keep the roll of product unfolded to begin. Roll out the film and attach the painter’s tape to the edge of the window. After you have completed a side, unfold the film and pull it down. 4. Paint Trim Guard Simply put, you hold this 22-inch strip of metal against an unpainted area while painting against it with a brush.
Though this seems like the perfect masking tool, drips and stains can result, no matter how vigilant you are. You will need plenty of rags for this one. Place the trim guard on the edge. Pull your brush along the trim guard. Many rollers and brushes have been designed to help you automatically maintain an edge. The only problem: they don’t work very well. You’re better off using painter’s tape, masking film, and/or the cutting-in technique rather than relying on a pricey, gimmicky tool that will just end up in the trashcan. In a world dominated by “As Seen on TV” miracle painting tools like the EZ-Twist Paint Stick, is there a place for the common paint roller and brush? Rollers and brushes are still the best way to apply paint to your home’s interior. Roller covers are the fluffy tubes that you insert on the roller mechanism. Covers with a thicker nap hold more paint and are best for pitted, textured areas. Covers with a thinner nap hold less paint and are best for smooth surfaces.