best way to clean coach leather purse
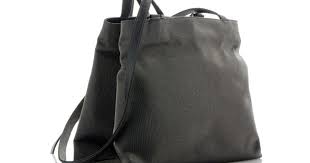
Once you find the perfect handbag, you hate to see it go. It starts with a scratch here and there, and then the zipper stops working. Pretty soon, that favorite bag is too embarrassingly shabby to carry. But there's hope for it yet. With designer handbags costing several thousands of dollars these days, services devoted solely to revamping handbags help the fashion-conscious extend the life of a beloved purse. Super Bowl Ad: Audi Spicer SEAL Raid Story 'B.S.', Former Obama Official Says Knife-Wielding Man Shot Near Louvre, Paris Conservative Speaker Sparks NYU Protests Could This Pair of Eyeglasses Mean the End of Bifocals?You carry your nylon purse with you everywhere you go, so you naturally want the bag to look its best. Nylon handbags resist water, wind and other types of damage. However, they attract dirt and stains after a few weeks of heavy use. Nylon bags don't need much special care, but if yours gets dirty, you can clean it up with a bit of soapy water.
Take everything out of your handbag. Turn the bag upside-down over a garbage can, then shake it a few times to remove crumbs, dust and other debris. Fill a bowl with lukewarm water. Add several drops of gentle liquid soap to the water. Stir the soap into the water until suds appear. Moisten a towel or rag with the soapy water. Squeeze the cloth to release excess liquid. Wipe the surface of the handbag with the wet towel. Wiping the bag gently will remove most debris. For stubborn stains, apply gentle pressure and rub until the mark disappears. If you still can't get rid of a stain, scrub it with a damp stiff-bristled brush. Blot the handbag with a clean towel to remove excess moisture. Allow the bag to air dry before putting anything in it. If you don't feel comfortable washing your bag by hand, you can also take it to a dry cleaner. Some nylon bags may also contain leather elements, such as the handle or trim. Wash leather parts carefully to avoid damage or color alteration.

How to Get an Ink Stain Out of a Nylon Jacket How to Clean Soiled Nylon Jacket Cuffs How to Get an Oily Gel Spot Out of a Nylon Jacket How to Get Mud out of White Nylon Mesh Shoes Proper Care & Washing of Nylon Panties How to Remove a Smoke Smell from a Polyester Nylon Jacket
air duct cleaning mold removal cost Find Out Which Haircut Is Best for You Canvas Vs. Nylon Tents How to Clean Nylon Totes Boots How to Frost Cupcakes With a Ziploc Bag How to Cook Chicken Leg Quarters in a Cooking Bag How to Whiten a Cotton, Nylon & Spandex Blouse How to Bake Ham in a Reynolds Oven Bag Nylon vs. Cotton Panties How To Waterproof a Raincoat How to Whiten Chiffon How to Clean White Tennis Shoes Without BleachMy tutorial on how to dye fabric shoes is one of my most popular posts, and lots of people have used it. I thought you might also appreciate a tutorial on how to colour leather shoes, because that can also be done.

Technically you aren’t dyeing leather: you are staining it, and this is infinitely more awesome than dyeing, because it means that you can colour almost any colour leather shoe to almost any other colour. A black shoe can become pale blue, a green shoe can become pink, etc. You can also use this tutorial to dye leather handbags, and to refresh leather goods that have become a bit worn with time. Today, to show you how to do it, I’ll be dyeing/staining a pair of chestnut brown leather shoes red, with black heels. These are my shoes before dyeing: Since I really like fashion history, I’ve used a pair of late 18th century shoes as inspiration for my colour scheme. I just love the red bodies with the crisp black heels. You can colour your shoes any shade you want, and use anything you want as inspiration. TRG Colour Dye comes in a huge range of colours. To dye your own shoes, have newspaper spread over your work area, and all your items read. First, open your Colour Dye kit.
There are other brands and other similar products, but this is the one that I’m familiar with, and it seems to be the most widely available leather dye product. Inside you’ll find a jar of dye, a jar of preparer, a little brush, a little sponge, and a mystifying direction sheet. Don’t worry about that last bit, that’s what I’m here for! You’ll be starting with your Preparer. The Preparer cleans your leather, and strips off any coatings which would keep it from absorbing the Colour Dye. Pour a little Preparer on to a Green Scrubby, and working in circles, clean and scrub the entire surface of your shoe/bag. You may need to put a little more preparer on to the Scrubby as you go. As you scrub the Preparer into your leather it may change colour slightly as the wet Preparer darkens the shoe. The back shoe has been scrubbed, the front shoe is still to be done except a small section on the toe which I’ve already started: When you have completely cleaned the shoes, let them dry for at least 15 minutes, so that the Preparer doesn’t prevent the Colour Dye from absorbing into the leather.

Once they have dried, you can start painting them. First use the brush with just a little bit of paint on it to paint the edges where the shoe meets the sole, and at the top of the foot, and any seams: If your original shoe/leather colour is fairly close to the colour you are painting the shoe/leather item, it won’t show up much at first. Once you have painted the seams and edges, use the brush to put a little paint on the sponge that came with the dye kit: With long, smooth strokes, use the sponge to smooth a light, thin layer of dye colour over the surface of the entire shoe: It’s a very light, thin layer, so may not show up much. Once you have both shoes, the first one should be dry enough for you to use the brush to put more paint on your sponge, and you can rub another light layer on. Keep smoothing on thin layers, allowing just a minute or two to dry between. Once you’ve put three or four layers on you should really see the colour change. At four layers, you can really see the difference between the body of the shoe and my as-yet-undyed heel:
Most items will need no more than six layers. If you aren’t sure if you have done enough, you can always let your item dry completely (for at least 48 hours), and then add more layers if needed. The colour will deepen and even out slightly as the stain dries. DO NOT attempt to continue decorating or mask off portions of your shoe for further dyeing until they have dried for at least 48 hours. If you do, this happens:If you accidentally pull off or scuff the finish before it has dried fully, you can always just touch up that area, and your new coat will just blend right in. Since I did a two-colour dye job, I waited for my first colour to dry slightly (just half an hour) before adding the second: I’d left the heels un-painted, but already I’d already Prepared them along with the rest of the shoe, so I could just start painting on black. Here they are with three layers of black on the heels. You can see how there is still some streakyness and chestnut brown showing through the black:

And here they are completely done: Lovely smooth glossy red shoes with crisp black heels! You can also use the Colour Dye to refresh worn out leather goods. I have a vintage red leather bag that I love, but that had gotten extremely shabby, with cracked leather: To restore the bag, first I treated it with the Preparer, just as I did with the shoes. Then I painted the worst areas of damage, the seams and the details with the brush. Then I used the sponge to smooth on three coats of Colour Dye. It didn’t need nearly as many coats of dye as the shoes, because the bag was already red. And here is the refreshes and restored bag: Here are the bag and shoe together, so you can compare the colour: The shoes are just a tiny bit darker, more oxblood than cherry, because the dye went over the darker chestnut colour, rather than red, but the difference is pretty subtle. After dyeing my shoes and the medium sized handbag, I still have more than half a bottle of shoe dye, so every kit will do at least 3 pairs of shoes: very economical indeed!