ac coil cleaning price
Keep cool with regular cleanings and maintenance from MACC. If you're experiencing a problem with your air-conditioning unit, Manhattan Air Conditioning Company (MACC) will assess the performance of your unit and make every effort to repair it on the spot. If your unit cannot be repaired with parts out of our truck stock, we will suggest a cohesive course of action to get your unit up and running as quickly and effectively as possible. Depending on the complexity of the necessary repair and age of the unit, the solution may be as simple as picking up a new part from our supply house or, for equipment 15 years and older, discussing your replacement options. Manhattan Air Conditioning Company will not sell you something you don't need. The Manhattan Air Conditioning Company Service Agreement Program can extend the life of your units to keep them running effectively and efficiently for years to come. We offer individual Share Holder/Unit Owner Agreements, as well as cost-saving programs for larger buildings with 50 or more units under one contract.
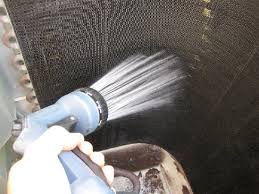
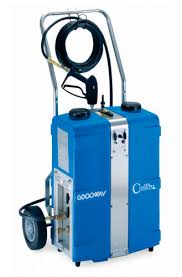
Upon request, we would be happy to meet with board members to discuss the different service programs we offer and to provide a list of similar buildings we have under contract. Our Service Agreement Program is offered to newer equipment (10 years or less). Service Agreements include proper cleaning and maintenance (spring and fall) and all necessary service calls throughout the year, plus all parts* and repair labor. Both our Preventive Maintenance Programs and Service Agreements help reduce the price of repairs and ensure preferred service response time (over noncontract customers) all year long, especially during our busy seasons. Preventive Maintenance Programs and Service Agreements can be customized to your building's needs. Pressure Washing ($425 per unit) Pressure washing and coil cleaning rids your unit of harmful contaminants such as dust spores, pollen and mold that can build up over time in units that haven't been properly maintained. A clean machine operates more efficiently so you can save on your electric bill and, more importantly, improve your indoor air quality.

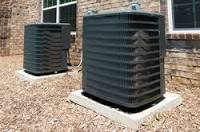
The price includes the removal of your unit to our shop facility for pressure washing, coil cleaning, inspection, replacement of air seals, painting of drain pans, and reinstallation.Twice in five years I’ve cleaned my outdoor AC condenser, and both times I’ve been amazed by the amount of dirt and leaves I’ve found. Fortunately, cleaning your outdoor coil is a task that any homeowner can accomplish, and it doesn’t take very long. A good cleaning will help your AC unit to function more efficiently, and potentially make it last longer too. Read on to learn how I removed the fan, outside panels and scrubbed away a lot of dirt and debris from my outdoor AC condenser. Editors note: This post originally ran in August 2009. In a related post about AC maintenance, one reader asked about cleaning an outdoor condenser unit, which prompted us to update this post with more pictures and information. If you find it helpful, give it a +1. Else, leave a comment and we’ll try to make it better.
The coil transfers heat from your home to the outside, and this process works best when air can move freely.
best wood floor cleaner and shineThat’s why outdoor units have those big ‘ol fans.
best way to clean pee off a car seatWhen dirt and leaves block up air passages, it’s that much harder to cycle enough air.
best canister vacuum cleaners 2015Plus, dirt and even dust can settle on the AC fins making them much less efficient. This in turn raises operational costs and shortens the lifespan of your compressor. This project doesn’t require much in the way of tools. You’ll need a nut driver to remove some metal screws, a hose, and a scrubber. I’ve got a handy brush that allows me to attach the hose and pump water through the bristles.
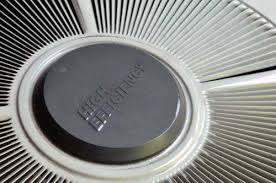
Cleaning my condenser is pretty much the perfect application for it. It’s best to start by turning off the breaker supplying power to the unit, and hopefully your panel is labeled better than mine. Next, remove any nearby obstructions. Most installation manuals will let you know the minimum clearance around and above the unit. If you don’t have access to the manual, try for at least two feet. My unit has louvered sides held together with a lot of metal screws, and I’d estimate I removed about 30 screws all together. Fortunately, they’re all the same. Just keep track of where they all go. If your unit has a grill instead of louvers, don’t even bother taking the sides off. You can effectively clean everything as is. You’ll see screws around the perimeter, at the corner where the top and sides meet (not the screws circling the fan). After you remove all those screws, the top (and fan) can be lifted off. Be careful because the fan is tethered with electrical wires.

If the installers had any sense, they left a generous length of wire and you can lean the top nearby. This picture shows the electrical compartment. And here you see the compressor. The side grills have more screws at all the corners and along the bottom edge. After you remove these screws you’ll see how the sides overlap and can be lifted up and off. It’s a good idea to remember where each panel was located. They should be identical, but this’ll help ensure that screw hole line up when you put it back together. Use your hose and brush to clean the grills, and hose down the fins (do not scrub the fins!). The fins maximize surface area for the heat exchange so if you accidentally mash them together, they won’t work nearly as well. Even an invisible layer of dust decreases efficiency so run your hose over everything (except the electric). I think this was the beginnings of a nest. You can see the fins and a few places where the fins are bent- probably from when the previous owner had the compressor replaced.